Vidlay Grub and Graphics
This documentation helps to assist users to navigate through “Grub,” Lightning Visual’s frontend GUI for the Vidlay software package. It also provides various steps on troubleshooting certain issues to do with graphics.
This documentation is currently in beta and any contributions or ideas will be greatly appreciated.
🔧: Topics marked with the spanner symbol indicate that they are troubleshooting steps for a specific issue.
Table of Contents
- Vidlay Grub and Graphics
- Table of Contents
- Adding an in-browser compositor
- The remote MQTT service
- Selecting a compositor and module
- TripleS Timing Module
- Racing Australia Module
- 🔧 General troubleshooting
- Changelog
Adding an in-browser compositor
This feature can be used if you would like to test components either before or during a race without disrupting the production CasparCG compositors providing on-screen graphics.
-
Navigate to https://vidlay.lightningvisuals.com/venkman.html
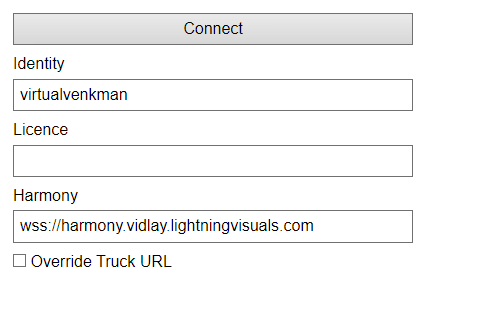
- Enter an identity. This must be unique across all compositors connected to Grub. You could use your name for example.
- Enter your License key.
- Press the connect button at the top. You should be able to see a “Connected to harmony” message at the bottom.
You should not need to change the “Harmony” field or tick the “Override Truck URL” checkbox.
The remote MQTT service
Lightning Visuals translates the data output from TraCe and uploads it to AWS where it can be retrieved. We host this application remotely on the cloud and TraCe must be connected to it for us to receive data.
If you are not getting heartbeats or data, you should first make sure that we are connected in TraCe settings. If you have confirmed this, you can contact support so we can restart the service or assist you further.
Selecting a compositor and module
Once you have logged in and either created a compositor or have been assigned a CasparCG broadcast compositor, you will be able to navigate to the races and start enabling components.
-
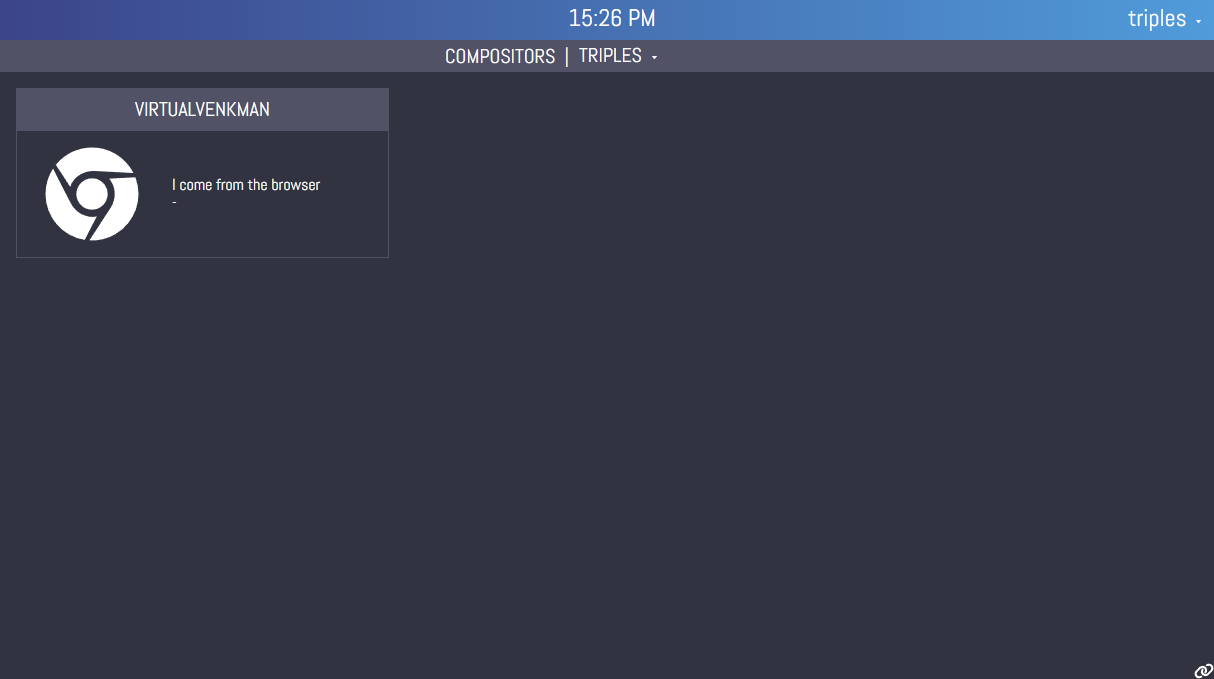
Hover over the top right hand corner and select compositors.
Note: The number to the right signifies how many compositors are connected.

-
Select your compositor.
If this is the first time you are selecting the compositor then you will be asked to start a Truck session. Clicking on “Start New Truck Session” will open a new browser tab if you are using an in-browser compositor. Otherwise, the Truck will be automatically connected to the compositor.
However, if a Truck has already been started, the open one will be used. Note: If you choose a compositor with an open Truck, interacting with the components will affect what is shown on that Truck. We do not support multiple Trucks on a single compositor.
-
Select a module.
By default, users will have access to the TripleS Timing module and the Racing Australia module. Both of these can be selected and used. The selections available may change according to the license of the compositor selected.
You should then follow the guide below specific to the module you have selected. Once the module is selected and you are on the race selection screen, you can use the watermark to check that the graphics has been connected properly.
The multiple tenant selector
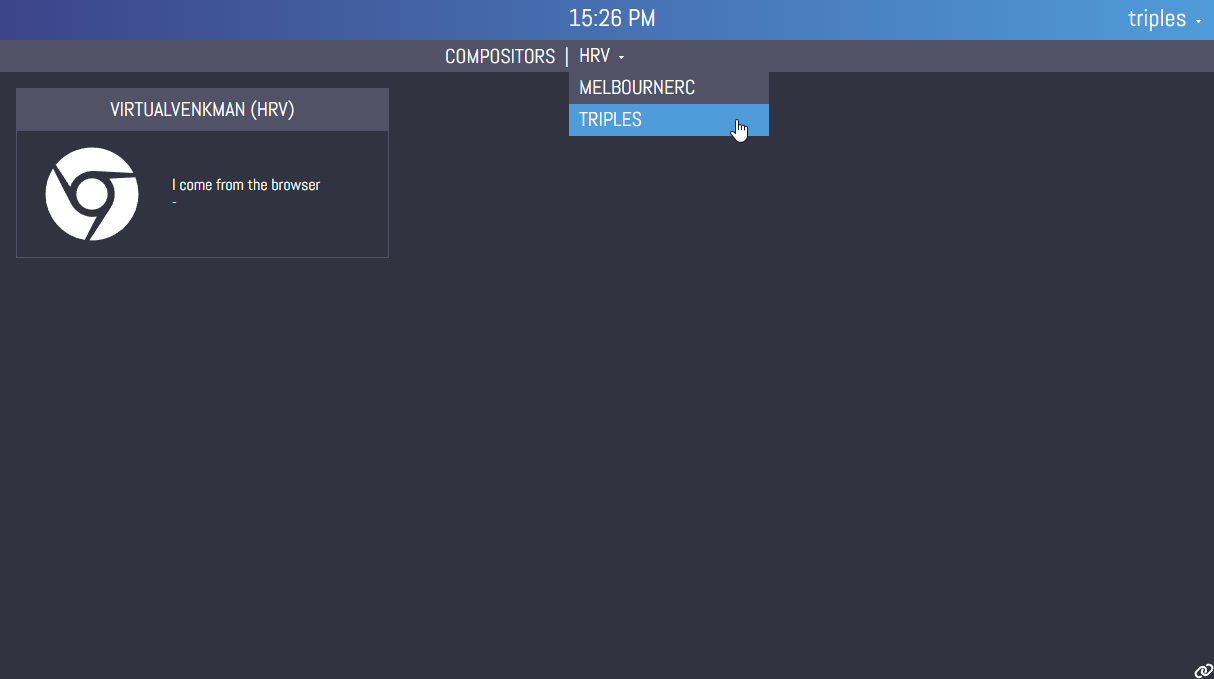
Tenants are a way to separate compositors between different users. User who have access to multiple tenants will see a dropdown so that they can access other users’ compositors without having to switch account. The tenant selector allows the user to switch who’s compositors they see. If an user does not have multiple tenants, they will not see and have access to the below feature.
While in the compositor selector screen you can use the dropdown to change tenant. Selecting a tenant will show the compositors for that tenant. Please note it may take a few seconds for the compositors to refresh.
| Triples tenant | HRV tenant |
|---|---|
 |
 |
All other actions are the same and the user can control graphics for any compositor.
TripleS Timing Module
Data streams
We support the selection of different streams of data at each venue.
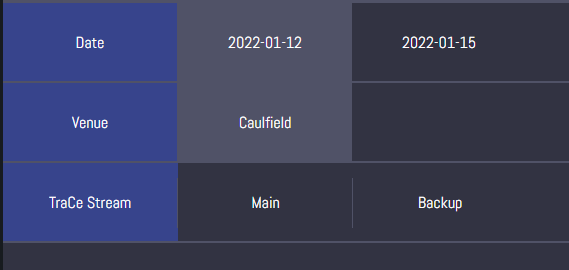
In NSW, ATC will have two TraCe streams outputting data for a race known as the “Main” and “Backup” streams. After selecting a compositor you are able to use any of these streams of data to broadcast. Generally you would want to set the Primary broadcast channel to the Main stream and the Secondary channel to the Backup stream.
In VIC, generally a backup TraCe will be running but in some cases there will not be. You will still be able to select which stream your broadcast will use.
If you are in the meeting selector you can select a stream after you have selected a venue:
To change the stream after you are in the race selection screen, you can press back button in the top left and select Main or Backup.
For a single compositor we only support having one stream enabled at a time per venue and race.
🔧 Cannot see a venue
Vidlay attempts to load static data about an event when it receives a message about a new event. We do not use the static data that TraCe provides but data from reliable sources such as RISA, RISE or TAB.
First, confirm that the connection to the remote service is working.
If the issue persists, you should contact support.
🔧 Cannot see a stream for a venue
Usually this means that the TraCe is not sending data to our remote service, or to one which doesn’t publish that stream. See instructions above about the local service.
🔧 Graphics are flickering on screen
If you see the components flickering in and out as above, more likely than not you have the race’s components enabled for more than 1 stream. This is because the two components are fighting each other to decide which is the one to show.
To fix this, disable the components for the stream that you do not want to show. For example, if it was the main graphics engine having the issue, you would need to disable the backup components. Follow the instructions above on how to change streams.
If the issue still persists, please contact support.
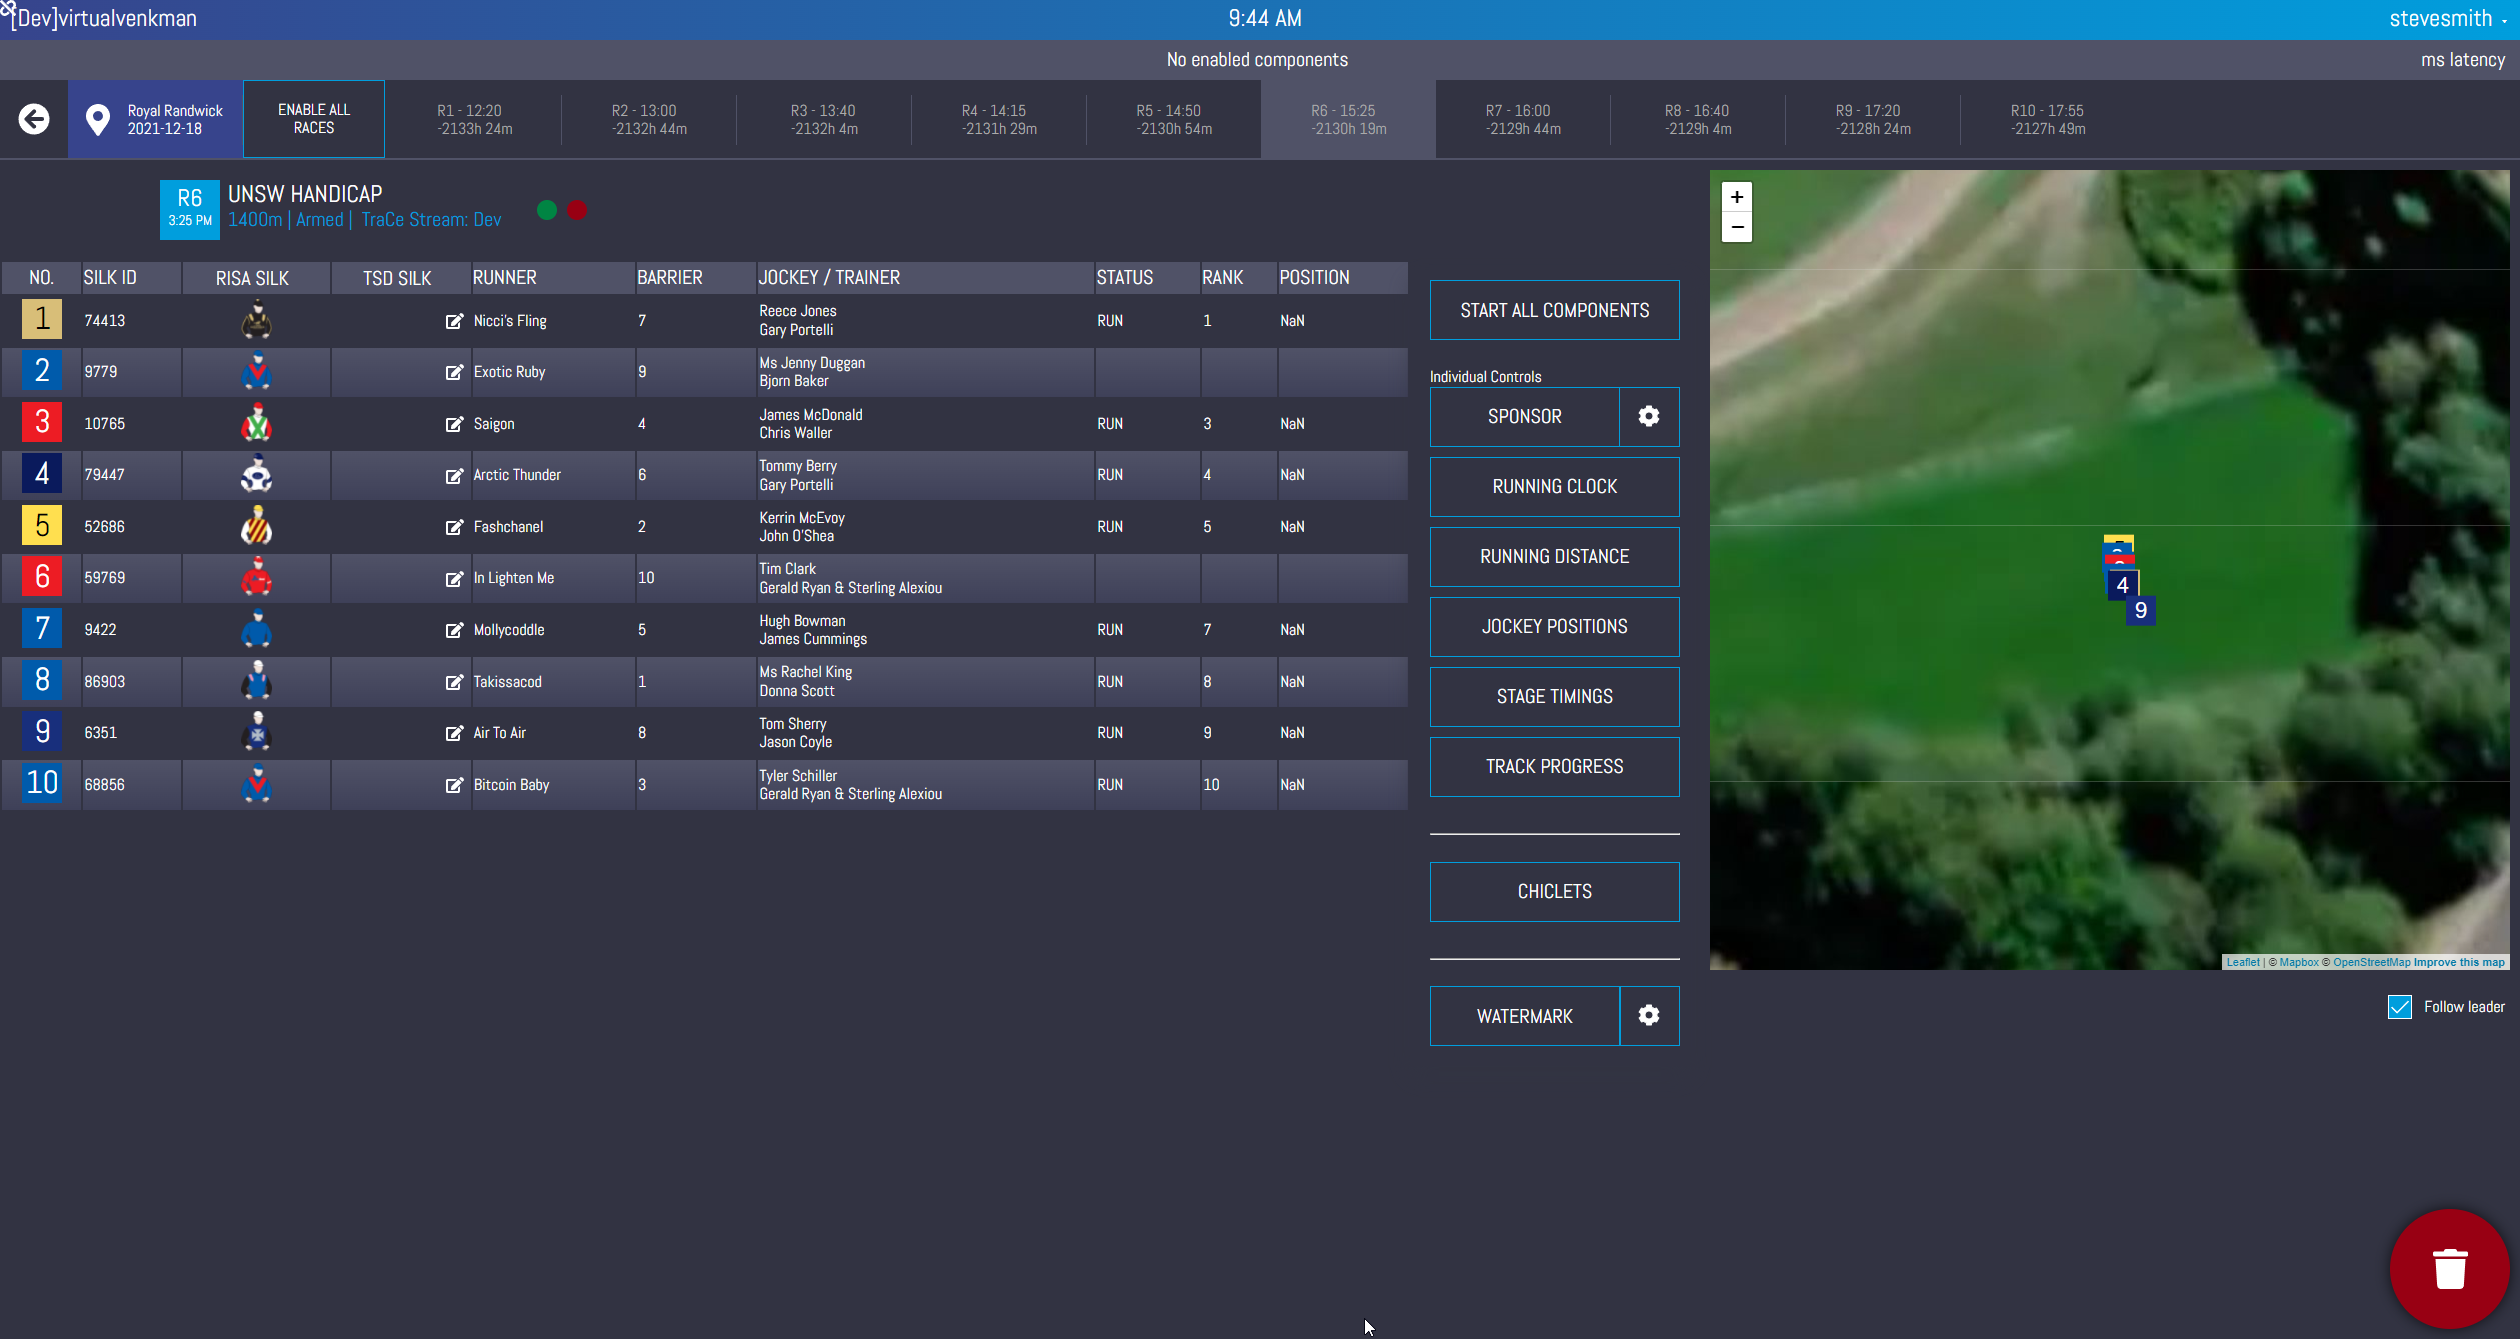
Starting components
For each venue there are three ways to start components:
- Click the “Start all races” button next to the race selection. This will start every component for every race.
- Click “Start all components” on the right panel next to the table. This will start every component for the selected race. All other races are unaffected.
- Click an individual component to enable or disable a specific component for that race.
Each button can also be used to do the converse action when it is toggled on. E.g. pressing the “Start all races” button will disable all components for all races.
Enabled vs. Visible
When a component is toggled, it will first go into the enabled state. However this component may not be visible on screen yet. This is so that one can toggle all components at the start of the day and components will automatically become visible when the time comes.
We represent this with the three states:
| State | Enabled | Visible on screen |
|---|---|---|
| Greyed out button | ❌ | ❌ |
Blue button with  |
✔️ | ❌ |
Blue button with  |
✔️ | ✔️ |
Heartbeats
We provide heartbeats within the race view so that when a data source goes down, the operator can be alerted and react. The first light is for the connection to TraCe and the second is for the connection to the clock.
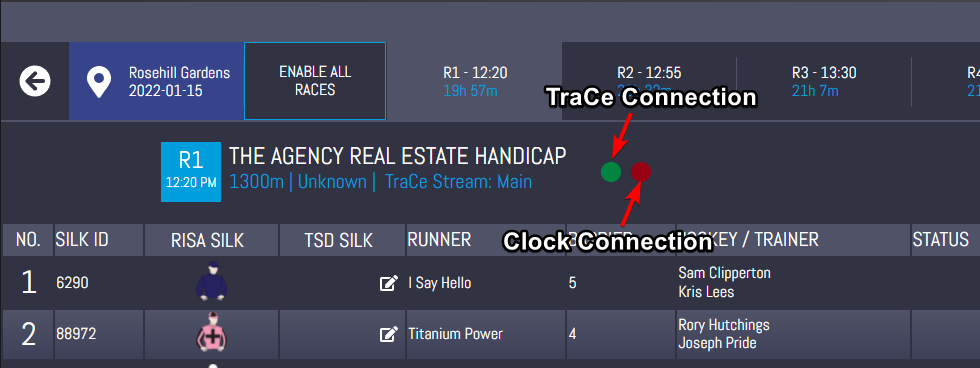
Heartbeats will change color from a bright green -> light red -> dark red depending on the state of the data source. The standard logic for this is that if we haven’t seen a data source for 10 seconds then the heartbeat will become red.
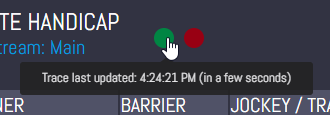
To find out more information such as the exact time when we last saw a data source, one can mouse over the heartbeat.
For all heartbeats, the first step is to refresh the page. There may have been some loading issue that prevent the change of the heartbeat.
🔧 TraCe heartbeat is dark red
First, refresh the page. There may have been some loading issue that prevented the heartbeat changing. Then wait 5-10 seconds to see if it updates.
If the issue still persists, check the connection to the remote service. It this still does not work, contact LightningVisuals via a support channel.
🔧 Clock heartbeat is dark red
First, refresh the page. There may have been some loading issue that prevented the heartbeat changing.
For the RV clock, this is normal after a race has finished. It will freeze on the last message so we expect the heartbeat to be red. For long times before a race, there is a period where the clock will send very slow heartbeats and the heartbeat is untrustworthy.
For the TripleS clock, during race days we will always receive constant heartbeats. If the heartbeat is off this could mean that the judge has restarted the clock. If this is not the case, then you will need to contact support.
Using custom jockey silks
Selecting and uploading a custom silk
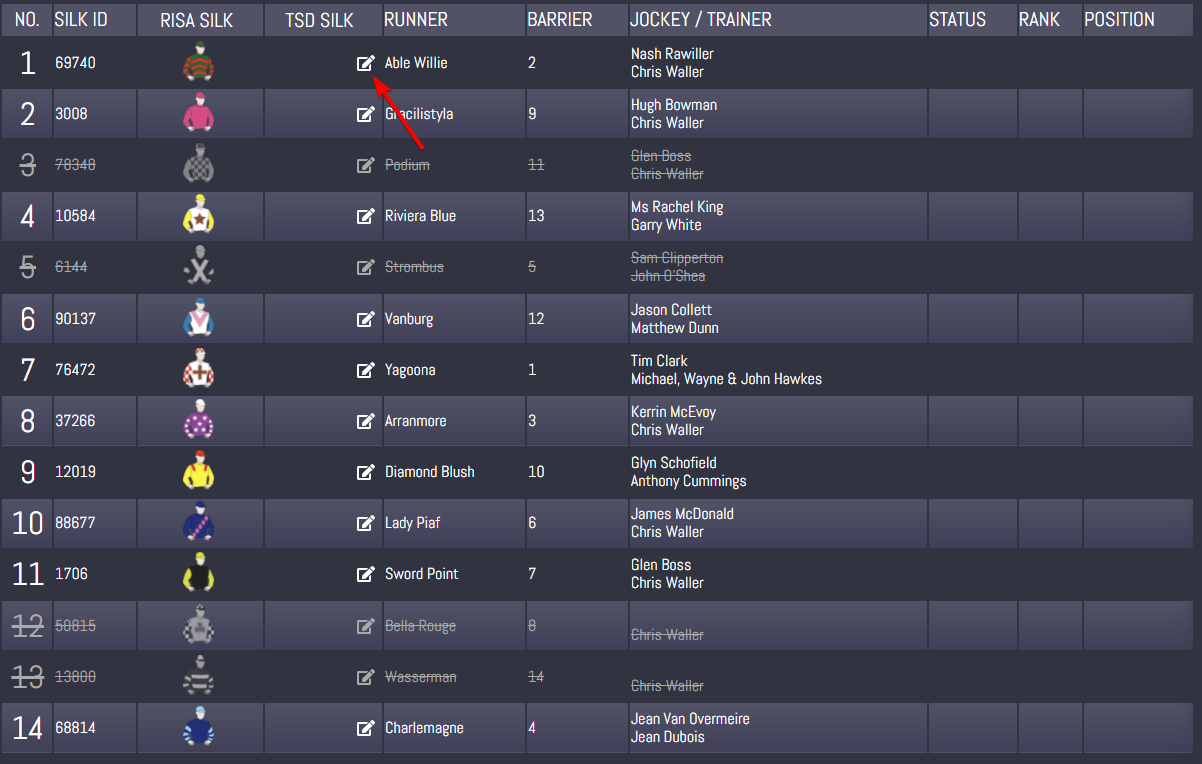
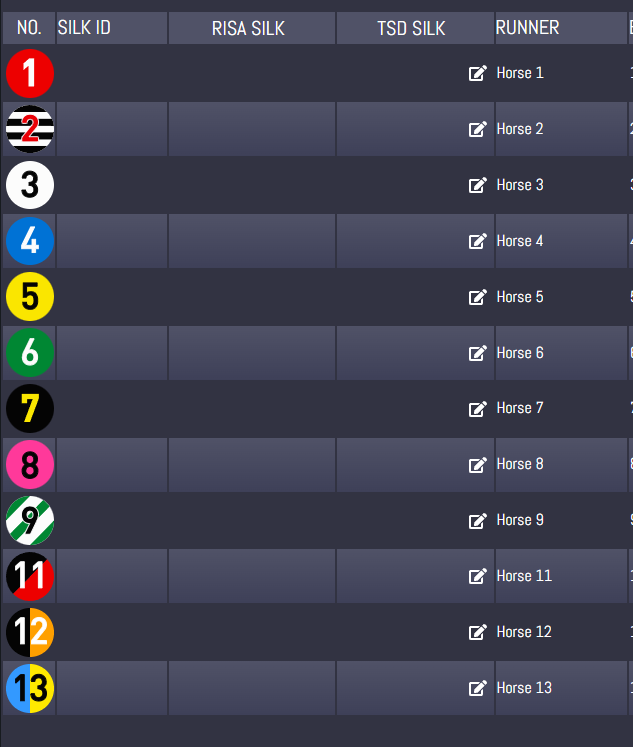
In the case where we need to manually change a silk from the RISA provided one (e.g. two jockeys have the same silk or emergency circumstances), you are able to change the silk from the table of jockeys after you select a race.
-
Click the “edit” button for the jockey in the runners table.
-
A window with a search box pre-filled with the RISA Id will open. You can select one of these options or upload your own silk by clicking the button next to the search bar.
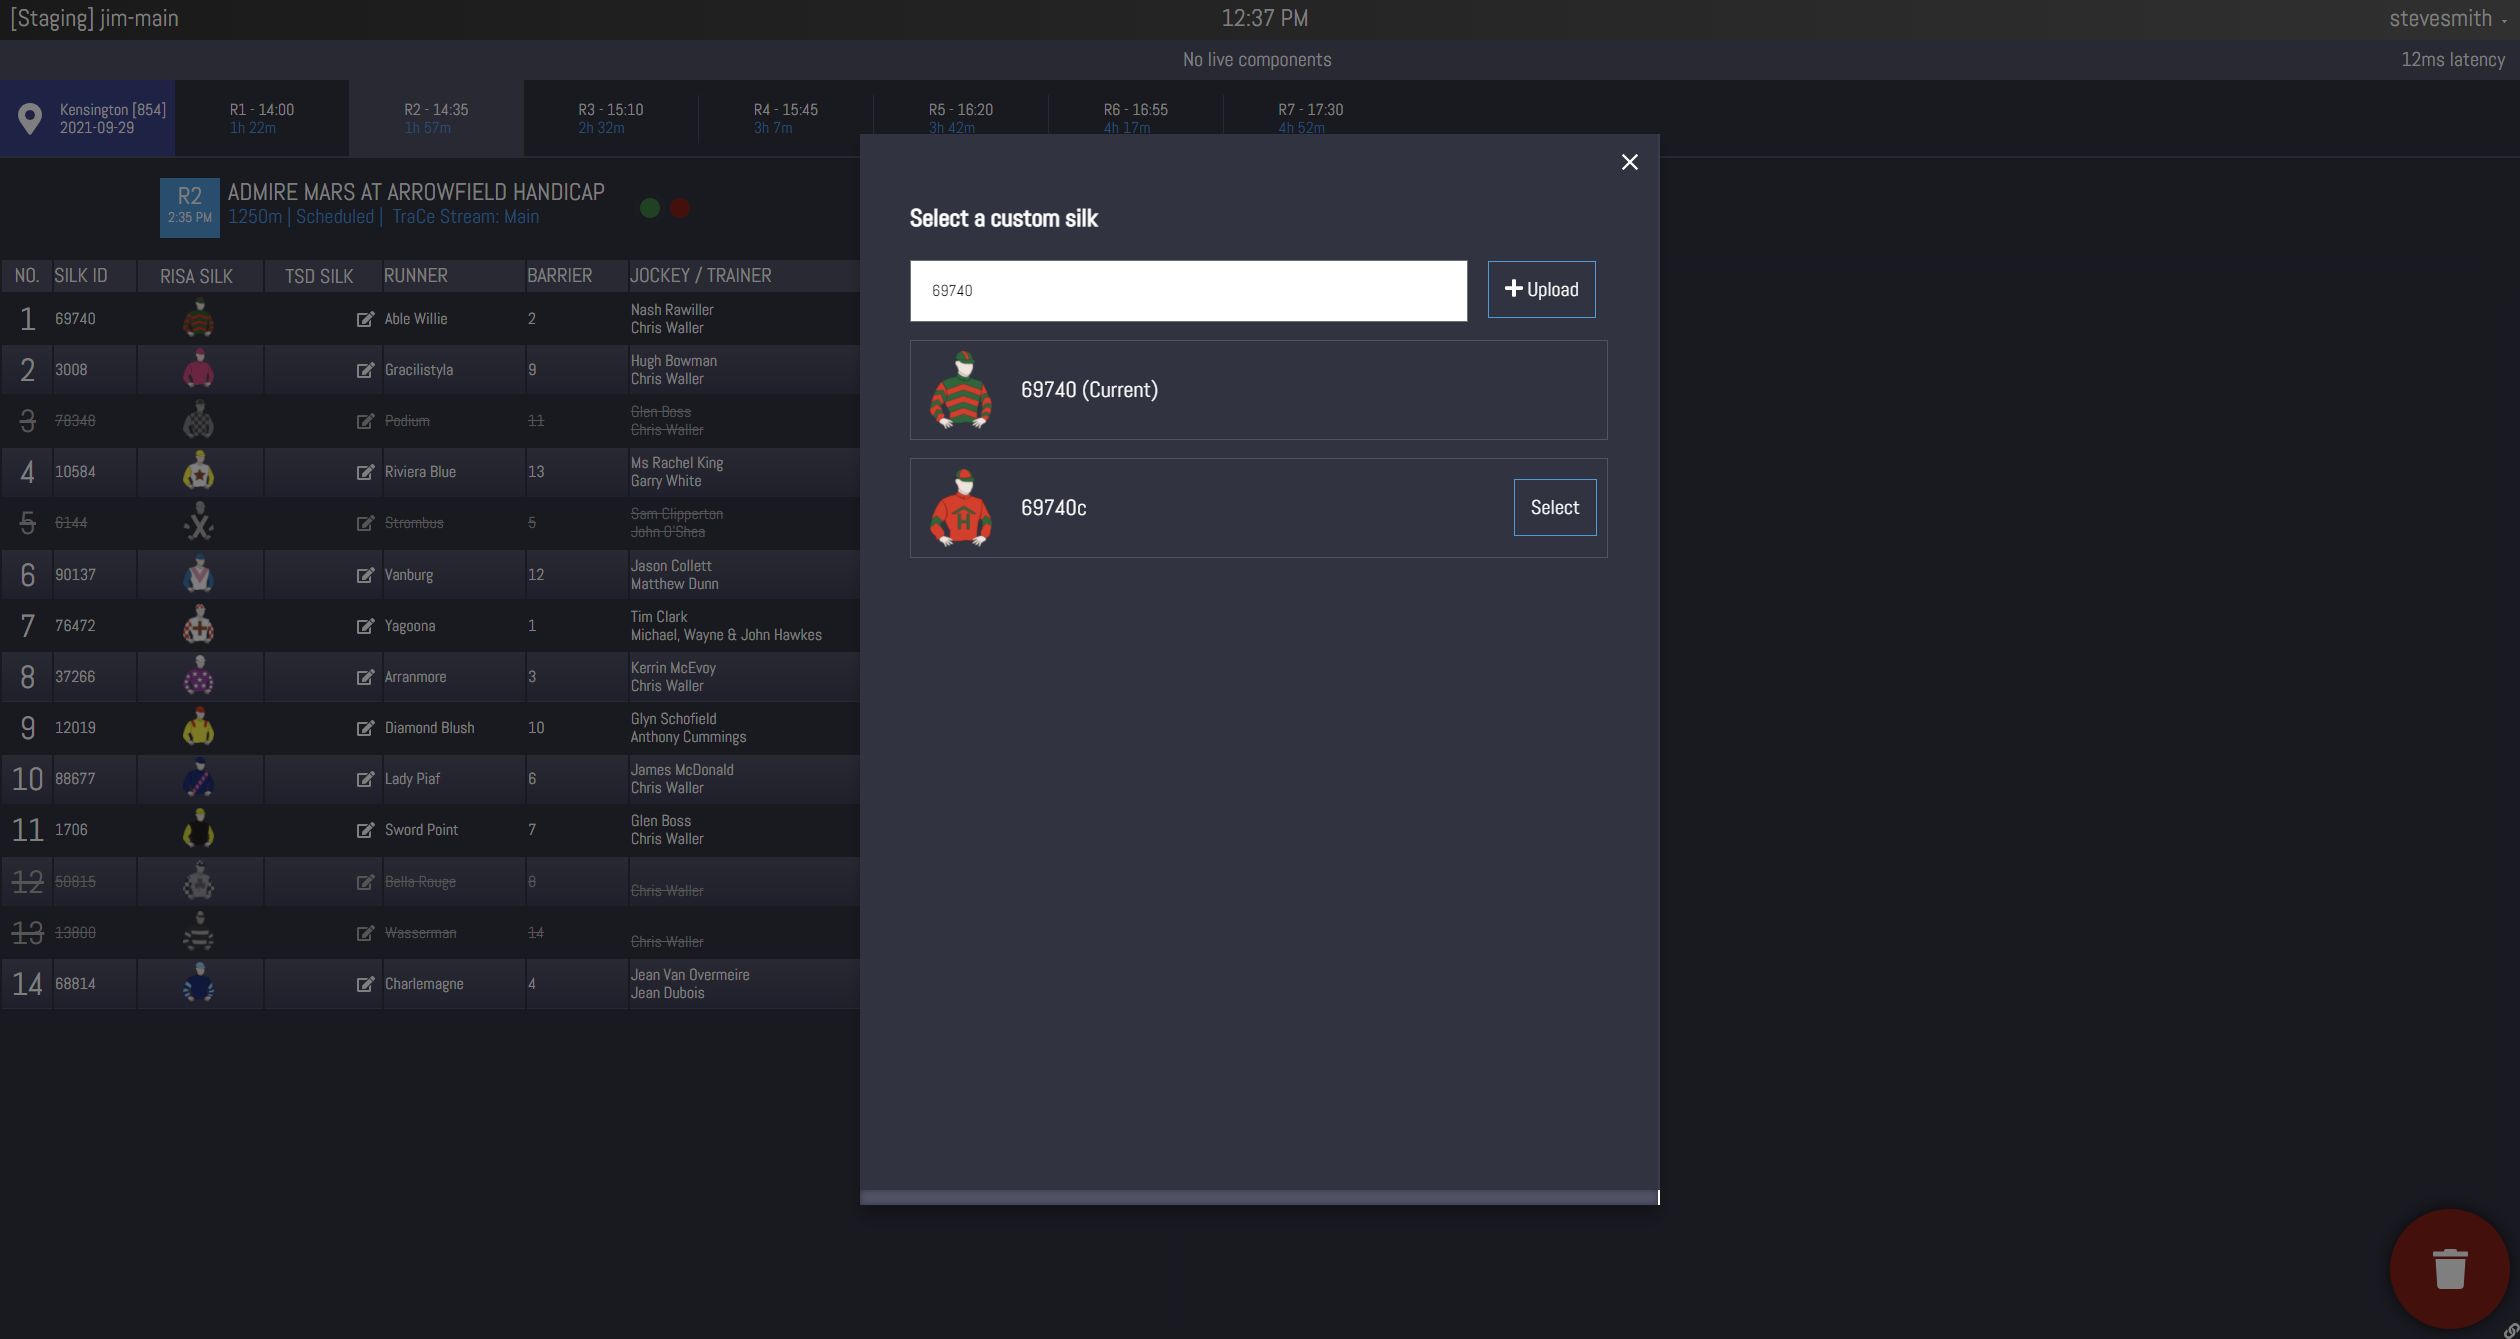
-
After selecting or uploading, the window will close and you will see that the silk has changed.
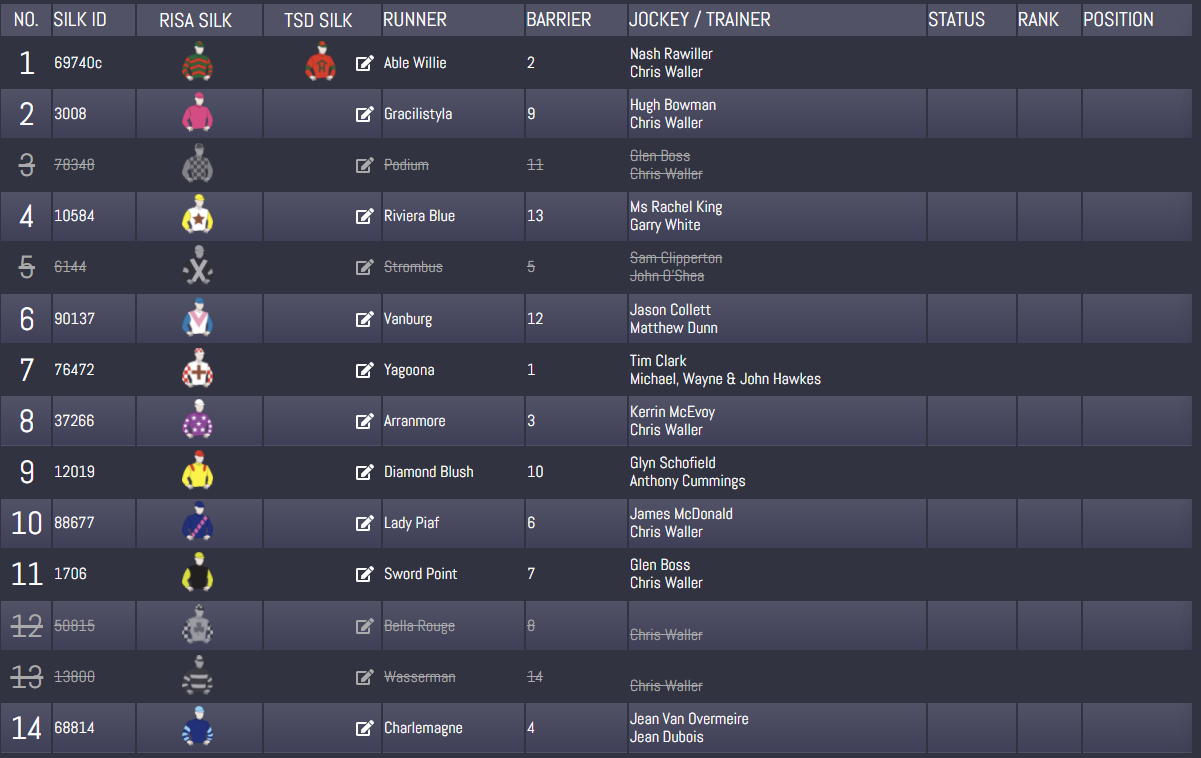
Note: Custom silk selection is different for each stream of data. i.e. selecting a custom silk in the Main stream will not carry over to the Backup stream. You will have to navigate to the backup stream and change it there as well.
Reverting a custom silk
If you would like to revert a custom silk back to the original RISA silk, you can open up the edit panel and click the “Revert” button next to the currently selected silk. The window will close and you will see the TSD silk disappear.
Using sponsor for the venue
Selecting and uploading a sponsor
You must populate a sponsor for the venue to ensure that one is shown in on-screen graphics. We will remember the last sponsor selected for this venue. However, we still recommend that you check at the start of the day to make sure the correct sponsor is selected.
-
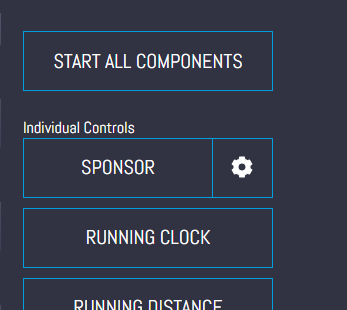
Click the cog button next to the sponsor button. This will open up a window where you can manage sponsors.
-
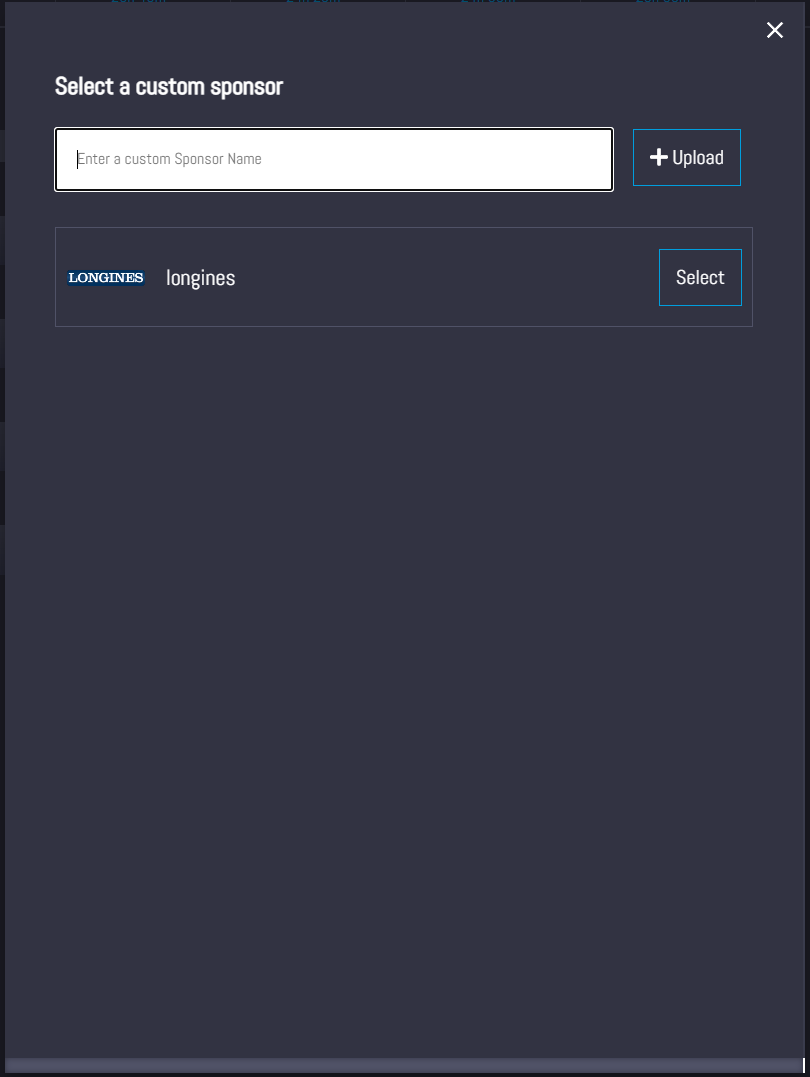
Search through the current listed sponsors and see if the one required is already listed.
If the sponsor is there already, you can press “Select” and the sponsor will be used. If not, you can continue to upload the sponsor.
-
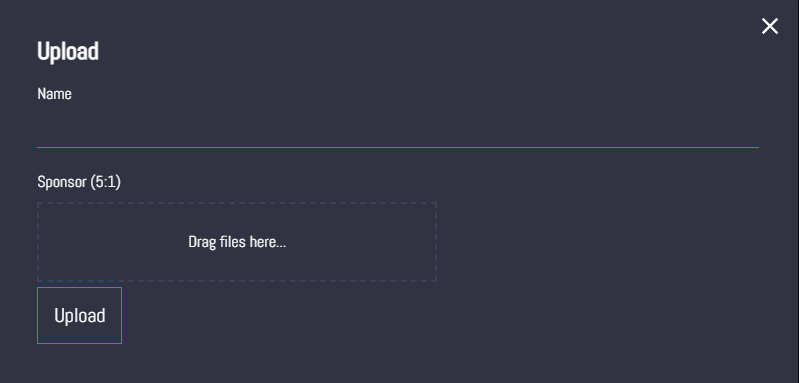
To upload a sponsor, click the “+ Upload” button.
Provide a internal recognizable name and a image.
The size and shape of the sponsor will be different depending on what module the sponsor is for. This is by design of what we show in on-screen graphics. We will try show a mask of what the sponsor will look like when it appears on screen. You should manually check that there is sufficient padding and no elements have been cut off.
After clicking “upload”, the uploaded sponsor will be automatically selected and the window closed.
Note: We only take PNGs, JPEGs, or WEBMs if you want to upload a small video (with some animation).
Reverting a sponsor
To revert the sponsor, you can follow the above steps and click the “revert” button on the sponsor with the “(current)” tag. This will always be at the top of the selection list.
The Chiclet sample
We have included a sample of the Chiclet that will be used if you have the Chiclet model enabled. This is simply to give you can indication of what it will look like on screen. If the auto generated sample was not accurate, you can click on the Chiclet sample and change the colours using the colour picker.
| Grub | Graphics display |
|---|---|
 |
 |
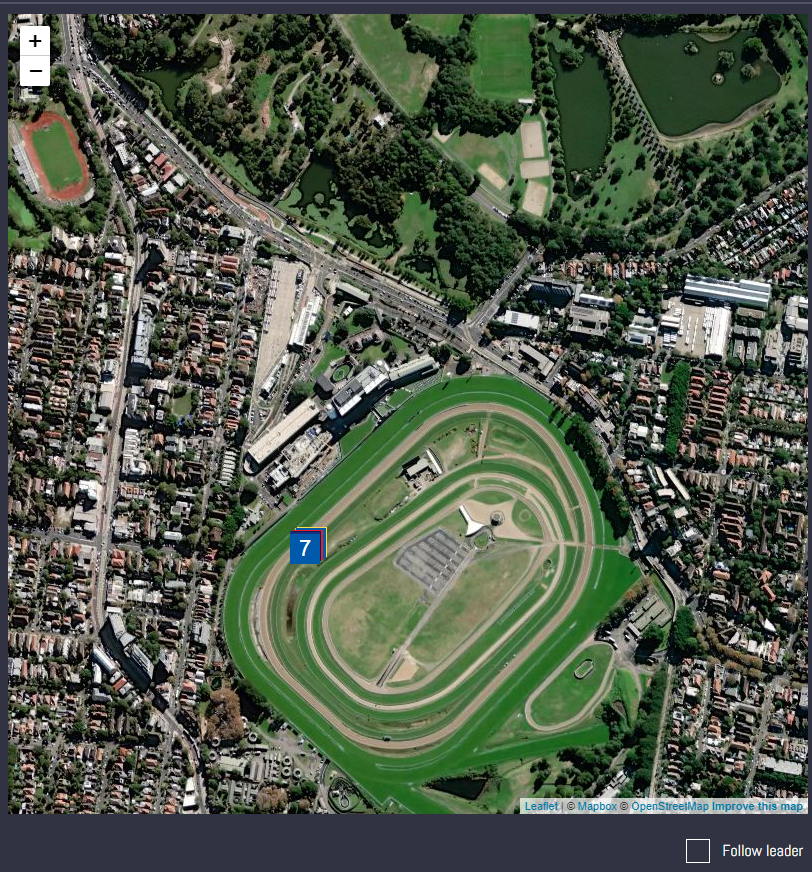
Using the live running map
We have included a satellite image map with our chiclets as the horses. This feature provides a way for operators to see the position of the horses that we see. We don’t do any processing of this data, it is just their raw position.
The map is different per race so you will need to switch to the current or upcoming race to view the data.
On default, the “Follow leader” checkbox is ticked. This will follow the first ranking horse with a set zoom level once the race starts. You can uncheck it and pan around if you need.
| Follow leader ✔️ | Follow leader ❌ |
|---|---|
 |
 |
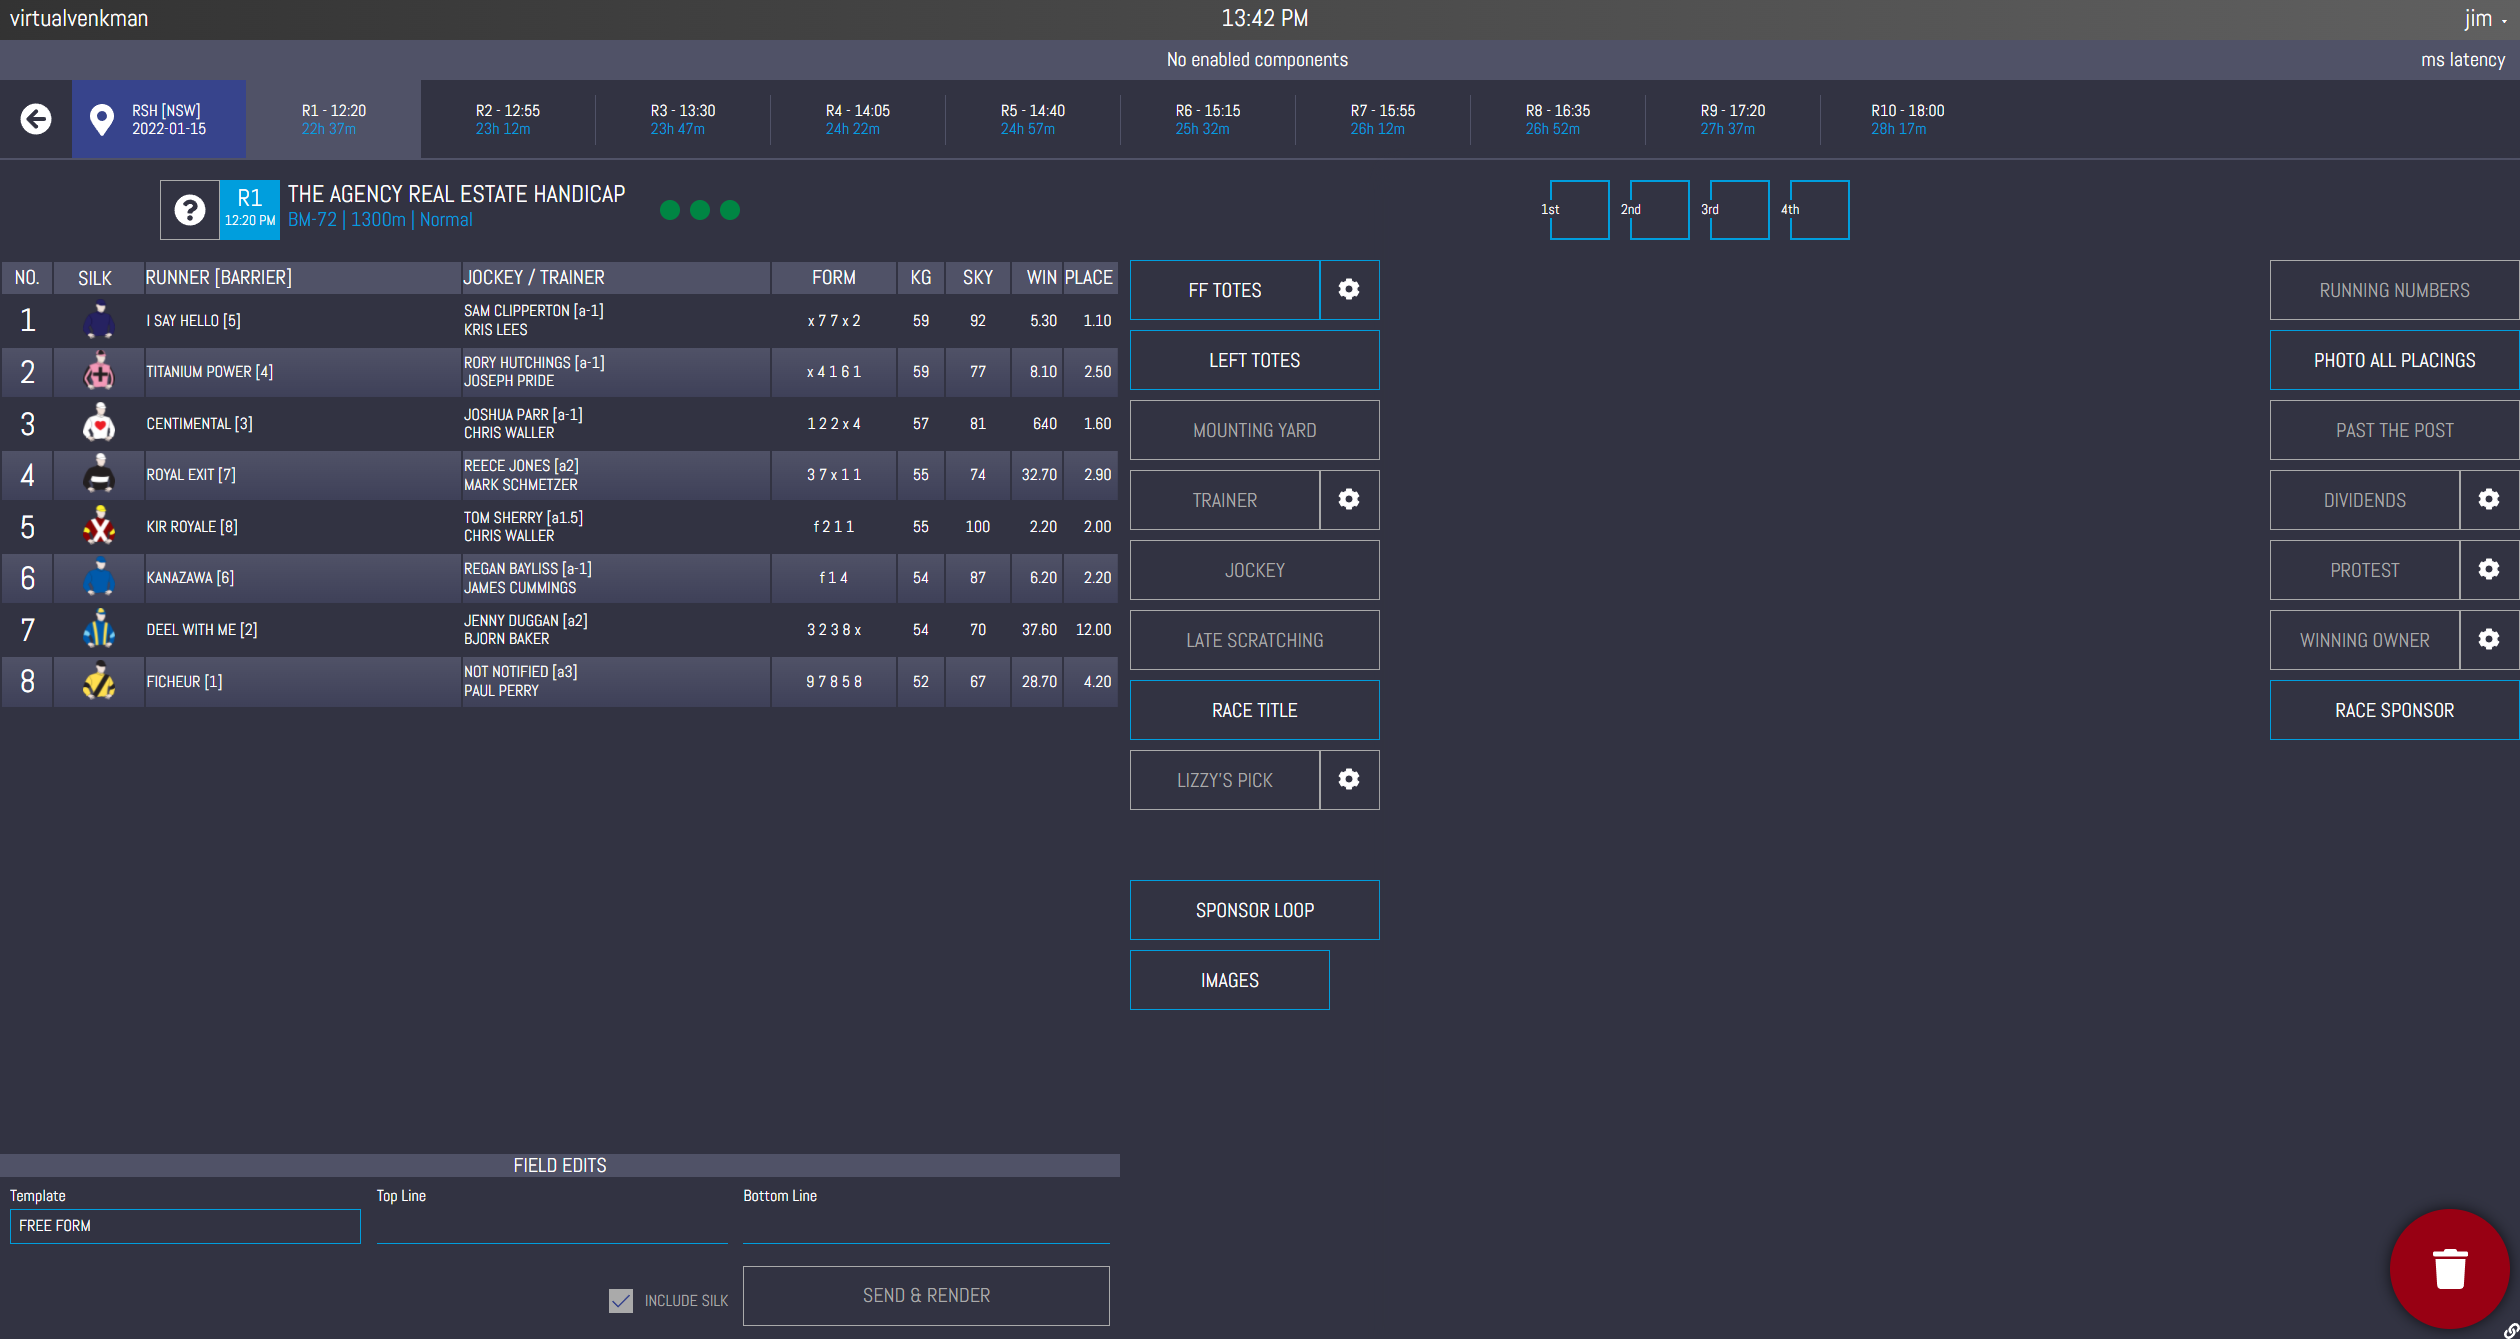
Racing Australia Module
Note: This section is mostly incomplete and awaiting additions.
Selecting a venue
The meeting selection is divided into three categories. First a date is selected. Then select a venue based on its TAB code. Venues have an icon representing whether the venue is for thoroughbred horse racing, harness racing, or greyhound racing. After this, a TAB jurisdiction must be selected for the venue. We use this jurisdiction to determine which prices to load. In general you’d want to select the state that matches where graphics will be shown.

Components and races
The Racing Australia module has two sets of components, the pre-race components on the left side of the page and the post-race components on the right side of the page.
Selecting a sponsor for the race
- Click on the circled question mark symbol next to the race header.
- You may now select a sponsor and press “use this sponsor” if the desired one is already in the list or choose to upload one.
- To upload a sponsor, click “upload new sponsor”.
- Provide a name and any optional keywords that can be used for searching.
- Provide a square tile image of the sponsor that can be used in the race title and other pre-race components.
- Provide a full screen 1920x1080 image for the sponsor that can be shown in the sponsor loop.
- Clicking “upload” will upload the sponsor and highlight it.
- Press “Use this sponsor” to select the sponsor.
Populating the sponsor loop for the venue
Click the “image” button under the sponsor loop. You can now upload full screen images as required. Make sure to hover over the image and click the trash can after uploading each image to upload a new image.
After all images have been uploaded, you can reorder the images by dragging and dropping as required.
🔧 General troubleshooting
🔧 Accidentally closed Truck
Simply follow the steps in Selecting a compositor and module. There is no change needed on our side for the change. Testing with the watermark is sufficient for informing that the steps worked.
Changelog
Version 1.4
- Add section on the multiple tenant selector
Version 1.3
- Remove sections about the local service
- Give a little information about our remote service
Version 1.2
- Add section about chiclets sample
- Add section about the live map
Version 1.1
- Add section about the local service
- Add troubleshooting tips about not being able to see an event or stream
Version 1.0
- Initial release